Overview
AgileBlue securely connects your M365 tenant to run on-demand and scheduled security assessments using M365 modules and CISA’s ScubaGear. Results are then processed by our reporting engine and presented as clear summaries and risk scores, along with actionable remediation guidance to help improve your M365 security posture.
Prerequisites
- Access to the Microsoft Entra Admin Console
- Sufficient administrative privileges to grant API permissions and assign directory roles
- ScubaGear Certificate File
- Permissions to create application registrations
Download ScubaGear Certificate
- Log in to the AgileBlue SecOps Portal
- In the left-hand column, navigate to Office365 Assessment
- Toggle the switch to Enabled
- Click Download Certificate
Please note, this certificate will be valid for 365 days. When that timeframe has passed, the download certificate button will become available and the cert will need to be refreshed.
Register A New Azure Application
- Log in to the Microsoft Entra Admin Console
- Navigate to Entra ID
- Select App registrations
- Click New registration
- Provide a name for the application (use any name that can be easily referenced, ex. AgileBlueScuba)
- Click Accounts in this organizational directory only (Single tenant)
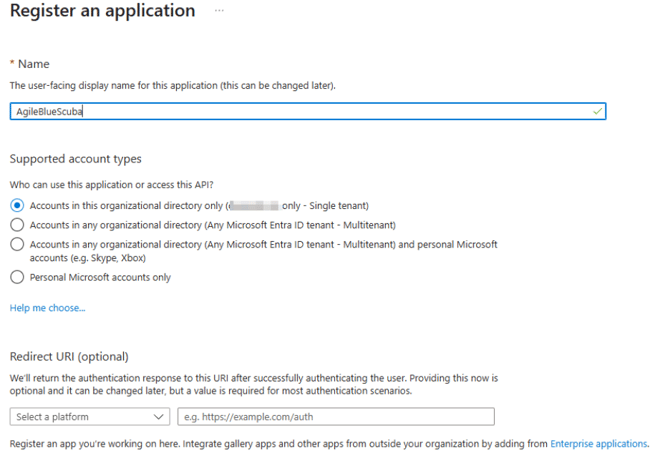
- Select Register
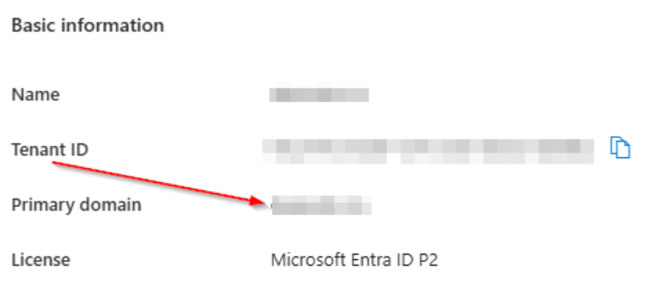
- After registering the application, copy the Application (client) ID, which will be needed for the Assessment Configuration Form in our portal

- Next, collect your Primary Domain, which can be located on the landing page of Azure on the Overview page; this will be used for the Organization field later on
Configure Microsoft Graph API Permissions
- From the app created in the previous section, select API permissions
- Click Add a permission
- Choose Microsoft Graph
- Select Application permissions
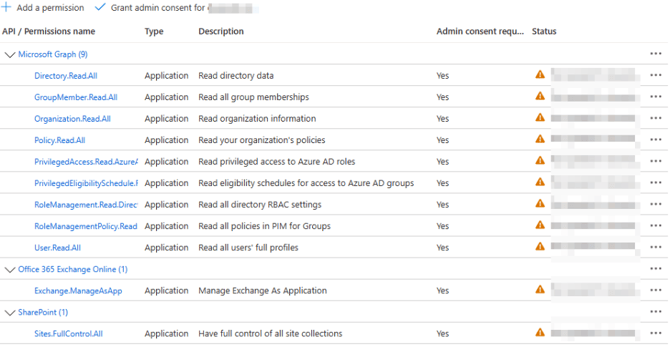
- Add the following permissions:
- Directory.Read.All
- GroupMember.Read.All
- Organization.Read.All
- Policy.Read.All
- RoleManagement.Read.Directory
- RoleManagementPolicy.Read.AzureADGroup
- PrivilegedAccess.Read.AzureAD
- PrivilegedEligibilitySchedule.Read.AzureADGroup
- User.Read.All
- Click Add permissions
Configure Additional API Permissions
Exchange Online Permissions
-
Click Add a permission
- Choose APIs my organization uses
- Search for Office 365 Exchange Online and select in, then choose Application permissions
- Add the following permission:
- Exchange.ManageAsApp
- Click Add permissions
SharePoint Permissions
-
Once again, click Add a permission
- Choose Microsoft APIs
- Search for and select SharePoint
- Choose Application permissions
- Add the following permission:
- Sites.FullControl.All
- Select Add permissions
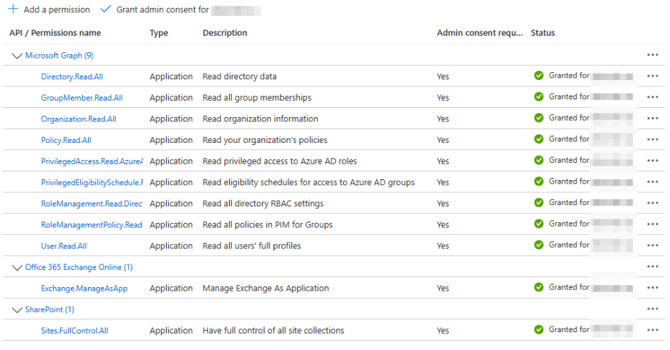
Once all permissions have been added, the full list should look like the image below:
Grant Admin Consent
- Confirm the permissions listed above are present
- Select Grant admin consent
- Click yes on the popup

- Confirm the green check mark under Status is present as in the image below
Assign the Global Reader Role
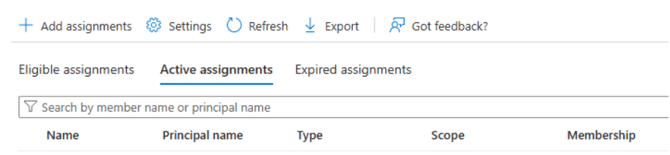
- Navigate to Roles & Administrators
- Click here as indicated in the image below

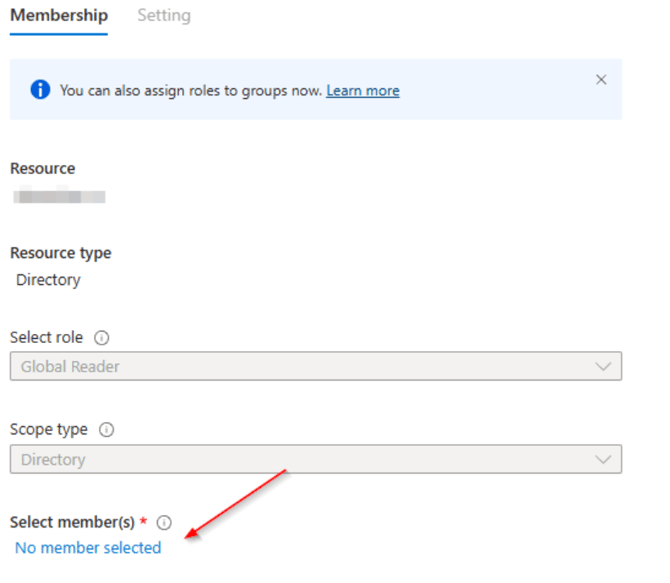
- Search for Global Reader
- Click the Global Reader role text; DO NOT click on the checkbox

- Select Add assignments
- Click No Members Selected
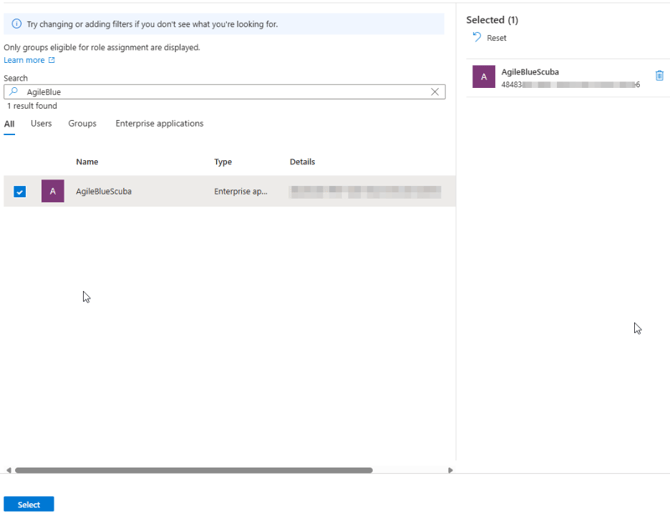
- Search for the application name created earlier
- Check box to attach Global Reader role
- Verify that the correct application has been chosen, then click Select
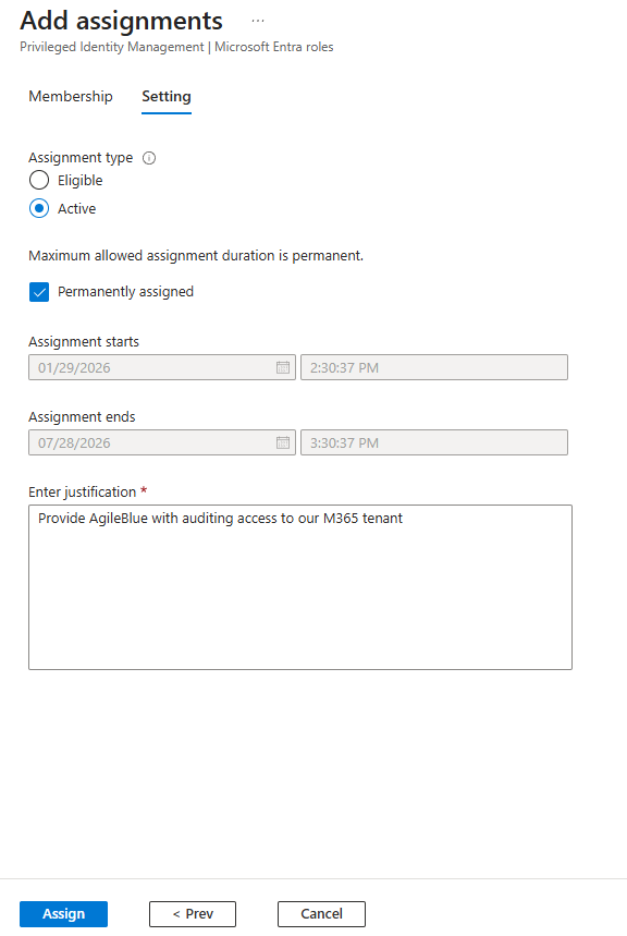
- Verify all values are correct and click Next
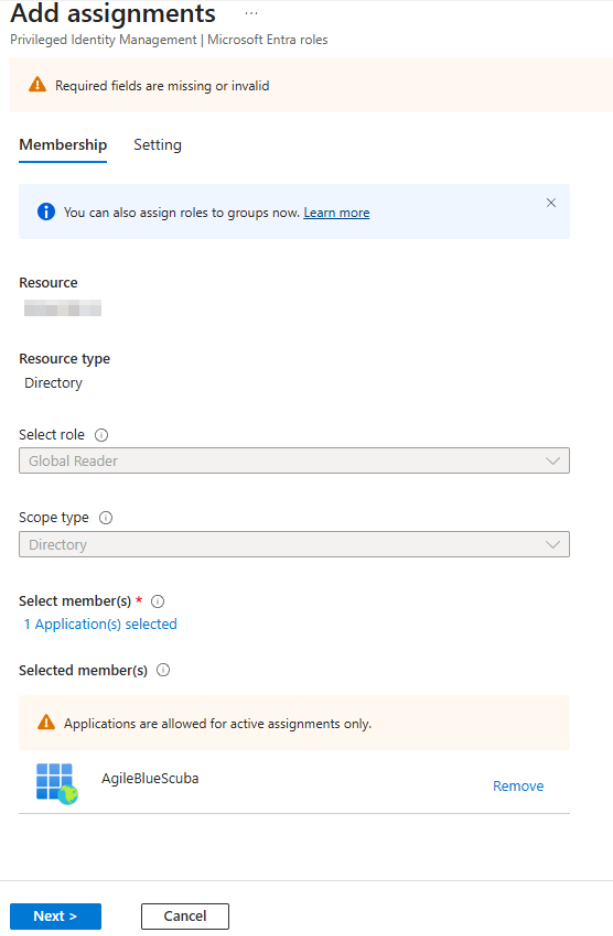
- Provide justification for access and maintaining permeance then click Assign
- Click refresh
Power Platform Permissions
- Open a PowerShell session with administrative permissions
- Check if PowerApps has been installed
- Run the command below:
Get-Module -Name *PowerApps* | Format-List Name

- If you do not see any results, use the following command to install the PowerApps library:
Install-Module -Name Microsoft.PowerApps.Administration.PowerShell -Scope CurrentUser –Force

- Allow the command to complete and accept any confirmations presented
- Execute the below command:
Add-PowerAppsAccount -Endpoint prod -TenantId (insert Tenant ID)
Be sure to insert your Tenant ID, which can be gathered from the Entra ID Administrative Page by selecting Overview
When prompted to authenticate, ensure you are using an account that has either Power Platform Admin or Global admin permissions.
NOTE: If this is a government organization in a GCC tenant, replace "-Endpoint prod" with "-Endpoint usgov" - Execute the following command (be sure to include the Application ID from the app created earlier in this guide)
New-PowerAppManagementApp -ApplicationId (Insert App Id)
- Close the PowerShell window
Upload the O365 Assessment Certificate
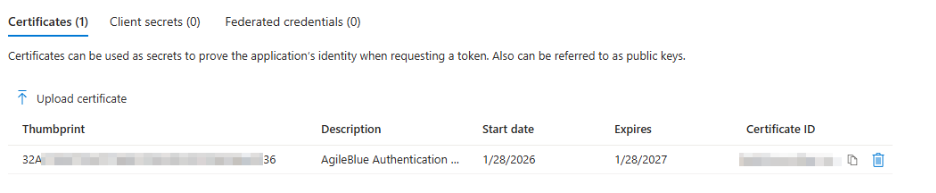
- Return to your created Application and select Certificates & Secrets
- Click Certificates
- Select Upload certificate
- Navigate to the location to which the certificate downloaded in the first section of this guide (Download ScubaGear Certificate) is saved
- Upload the certificate
- Click Add
- Copy the Thumbprint value found on the ensuing page, which will be needed later on
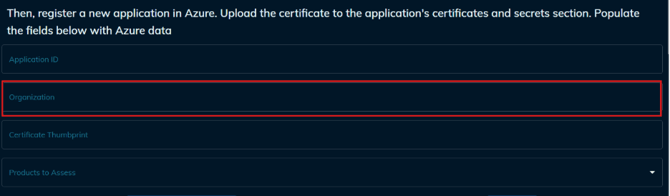
Complete Application Fields In AgileBlue Portal
- Return to the AgileBlue portal and navigate back to Office365 Assessment
- Fill in the information gathered in the previous sections:
- Application ID
- Organization
- Certificate Thumbprint
- Under Products to Assess, select each of the Microsoft products to be included in the scan
- Select the Environment Sensitivity appropriate for your organization:
- Non-government tenant
- Government cloud tenant
- Government cloud tenant (high)
- Department of Defense tenant
- Click Save Configuration
Scanning Cadence
On-Demand
Once the configuration has been saved, you can use the Scan Now button any time to execute an on-demand scan. Once a scan is completed, it will appear in the Assessment Scan History section and will include the start and finish times, the user who initiated the scan, and a summary of the findings. Full reports can be downloaded as a CSV file from the right-hand column.
Scheduled
To schedule recurring scans, click the + icon under Current Assessment Schedules. You can then choose specific dates or set scans to run automatically at regular intervals. Scans can occur multiple times per day, week, or month, or on a specific day of the week, month, or year.
These options are geared toward providing flexibility to automate your scanning workflow and ensure your products are assessed on a consistent, predictable schedule.
Need Help?
AgileBlue is always here to support you and ensure you are 100% successful. If there are any issues with the installation or if you have any questions, please reach out to AgileBlue Support.
Email: support@agileblue.com
Phone: (216) 606-9400🚨